How To Fix Install Error 0x80070103 in Windows 11
Windows 11 automatically installs necessary updates through the Windows Update service. In most cases, this happens without problems, and occasionally a reboot is required. But errors do happen, and install error 0x80070103 is one of them. The error is not new to Windows 11, it also existed in previous Windows versions. The most common scenario for this error is when Windows tries to install a driver update.
Causes for install error 0x80070103
Knowing what causes the error will help in understanding the steps to fix the problem. The possible causes for the error are:
- Windows Update tries to install a driver a second time for an additional piece of identical hardware such as a graphics adapter.
- Windows Update attempts to update an already installed driver to an incompatible, or unsuitable version of that driver.
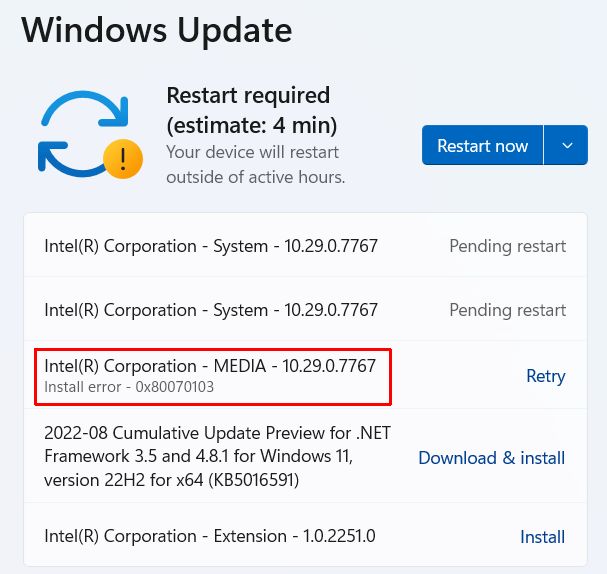
It can very well be that previous incomplete updates are causing the error as well. Be sure to check the update history or any pending restarts that are required. As can be seen in the screenshot above, the error relating to the Intel(R) Corporation MEDIA version could be caused by the pending restart required for the other Intel updates.
Solving error 0x80070103 in Windows 11
The steps for solving the error have not changed much since earlier Windows versions. The good thing about Windows 11 (and Windows 10 for that matter) is that Microsoft has included a Troubleshooter to analyze and fix common problems.
As mention in the section about possible causes for the error, make sure to restart Windows first. If required multiple times. Dependencies on previous updates can cause an update to fail initially.
Run the Windows Update Troubleshooter
Running the Windows Update troubleshooter in Windows 11 will let Windows check the Update service. If necessary, the Update service will be restarted to fix any issues caused by this service. In earlier Windows versions, manually stopping and starting the Update service was advised but this is no longer needed.
The steps to run the Update Troubleshooter in Windows 11 are easy to do for every Windows user.
After executing the troubleshooter and restarting the PC, try the running Windows Update again, or use the Retry option for the failed update specifically.
Update the driver manually to prevent install error 0x80070103
Since it is a specific driver update that is failing to install through Windows Update, installing it manually from the Device Manager can work. By installing the driver update manually Windows Update no longer needs to install the updated driver.
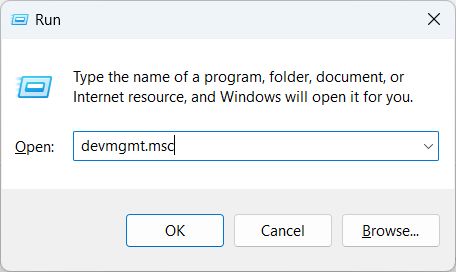
- Press the Windows + R keys to open the Run window, and then type “devmgmt.msc” and click OK or press Enter. This will open the Device Manager.

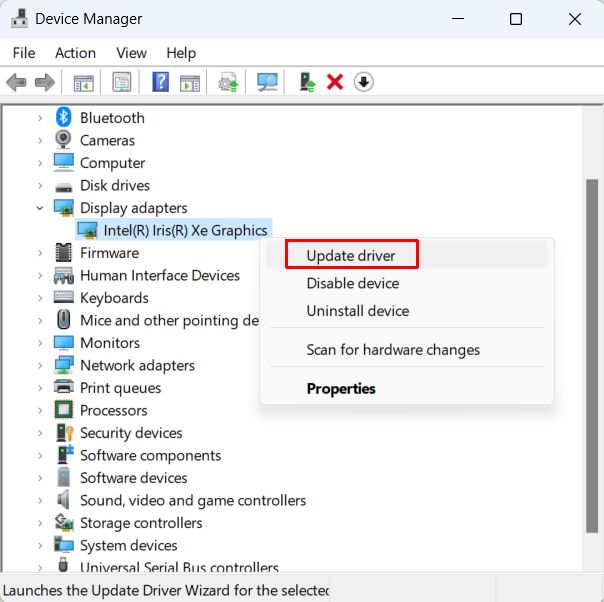
- In the Device Manager window, locate the device for which the driver update fails to install through Windows Update.
- Right-click the device, and in the popup menu, click Update driver.

- Next, click Search automatically for drivers to let Windows search and install the driver for the device.
- Click Close when done, and then close the Device Manager.
If Windows cannot find and install the driver for the device through the Device Manager, you can try downloading the driver from the manufacturer’s site first, and then use the option Browse my computer for drivers to install the driver from the Device Manager. It is important that you find and download the right driver for your device in this case. If needed, you can use a driver finder program for this.
Clear the Windows Update Cache
A less common cause, but still a possibility for install error 0x80070103 is a problem with the downloaded Windows Update files. To fix the error if this is the cause, the best thing is to clear the Windows update cache. Before clearing the cache, stop the update service, and afterward, start the update service again.
Here are the steps:
- Press the Windows + R keys to open the Run window, and then type “services.msc” and click OK or press Enter. This will bring up the Services window.
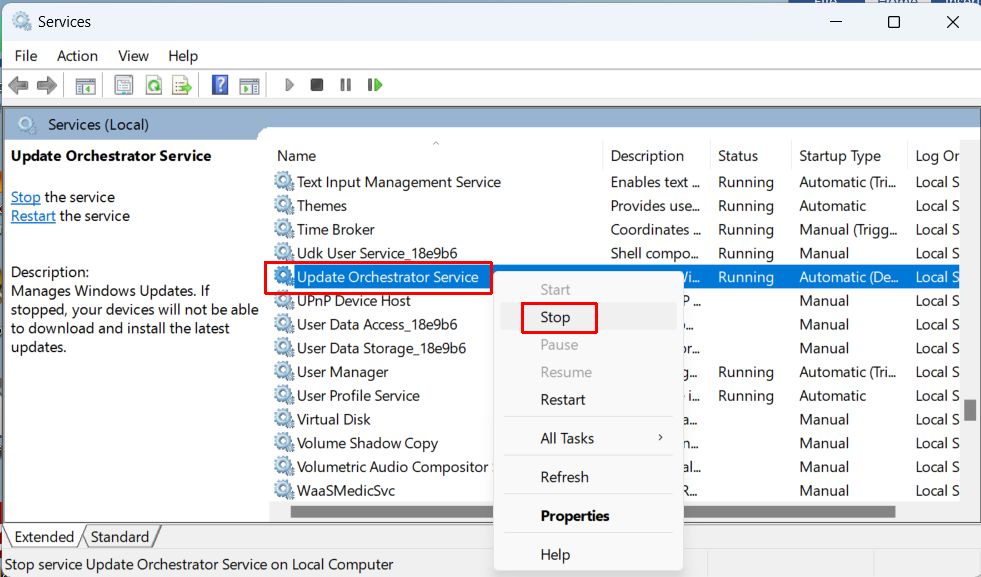
- In the Services window, locate the Update Orchestrator Service by scrolling down in the list.
- Right-click the Update Orchestrator Service, and in the popup menu select Stop.

- When the service is stopped, its Status will no longer show Running.
- Now also check that the Windows Update service is not running and if it is stop it in the same way. Since Windows Update is triggered by the Update Orchestrator Service, the Windows Update service should already be stopped in normal circumstances. You can read more about how the Windows update process works if you want to.
- Press the Windows + E keys to open a File Explorer window.
- Next, navigate to the following folder:
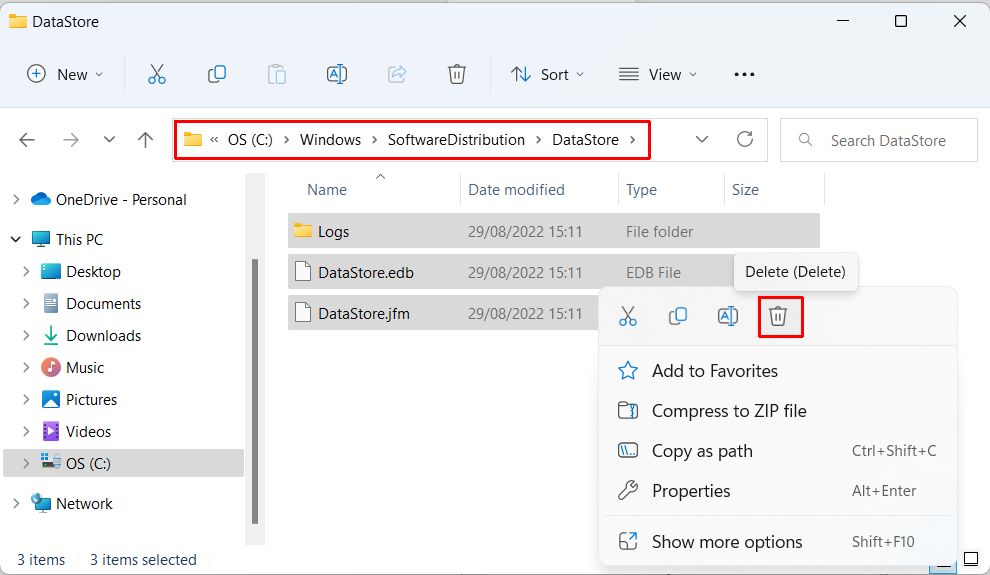
C:\Windows\SoftwareDistribution\DataStore - Select all files and folders in this location (using the mouse while holding the Shift key, or by pressing Ctrl + A).
- Right-click any of the select files or folders, and in the popup menu click the Delete icon.

- Repeat this process for the following location:
C:\Windows\SoftwareDistribution\Download
This is where Windows downloads the updates before installing. - Close the File Explorer when done.
- Empty the Recycle Bin on the Desktop to make sure the files and folders are really deleted.
- Now switch back to the Services window. Right-click the Update Orchestrator Service again, and in the popup menu select Start.
- Wait for the service to start and switch back to a Running Status.
- Close the Services Window, and reboot your PC.
Wait for Windows Update to run again and check if the install error is no longer present.
Prevent Automatic Windows Driver Updates
Of course, you can disable Windows Updates altogether, or pause it. This, however, will also prevent other updates to be installed, which can leave your PC vulnerable to errors or security issues.
So, the better option is to block Windows 11 from automatically updating the device drivers on your PC. Even here, this should not be the long-term solution. Updated drivers fix problems, improve performance, and can add functionality to your devices. But until a new driver is available that does not cause install error 0x80070103, disabling the automatic driver updates is a solution.
Disabling automatic driver updates in Windows 11 is done through the advanced system settings, like in previous Windows versions.
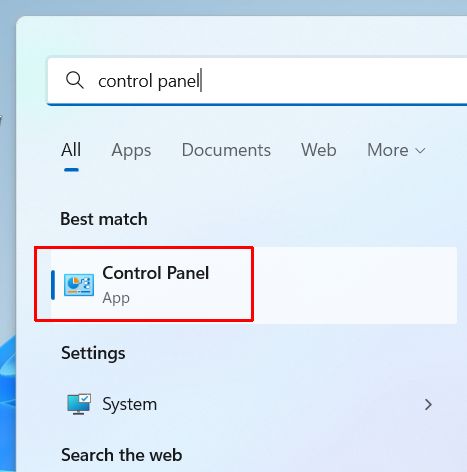
- Click the Start button on the taskbar, and then type “control panel” in the Search field of the start menu.
- Next, click the Control Panel App in the search results.

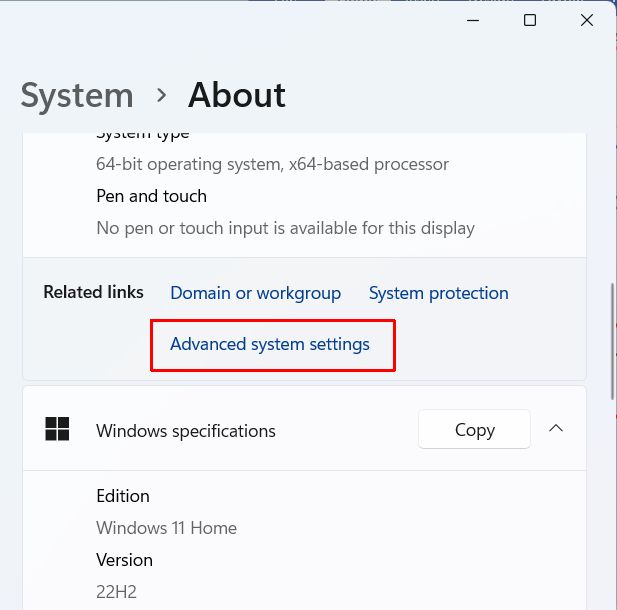
- In the Control Panel window, select System and Security, and then System. This will open the Settings window (System -> About).
- Now click the Advanced system settings under Related links.

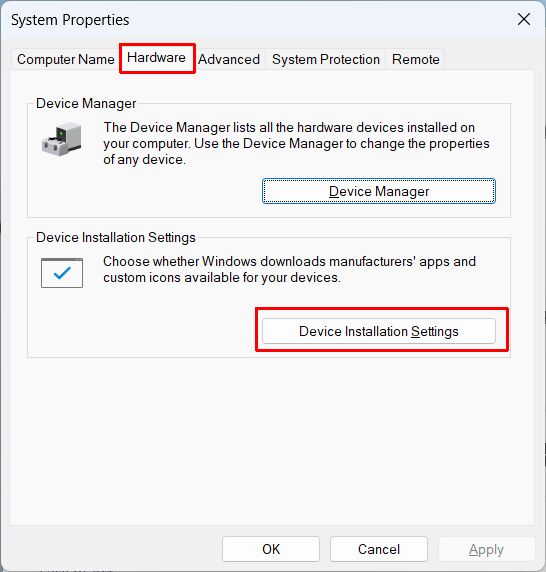
This will open the System Properties dialog box with the Advanced tab active. - Select the Hardware tab and click the Device Installation Settings button.

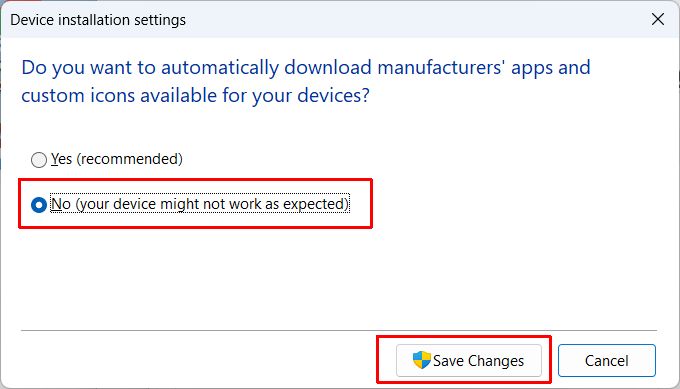
- Now change the option for the Device installation settings from Yes to No.
- Click Save Changes to confirm.

- Click OK in the System Properties window.
- Close the Settings window and Control Panel app.
After this, Windows will no longer automatically download and install manufacturers’ software for your devices (including drivers).


Thank you. It works.
@Fritz Liessling - Thank you for your feedback. I understand that you are looking for other resolutions, but within Windows…
Although the answer to this question is correct, it is really a cop-out answer. It's easy enough to find answers…
To the pcauthorities.com administrator, You always provide useful links and resources.
???? ?? ??? The Last of us