Network Error: 0x80004005, network shares
So recently I finally had time to upgrade my older system from Windows 8.1 to Windows 10. It came with its own set of problems, but once it was up and running, I noticed I could not access my NAS anymore. When trying to access it I got a Network Error window showing the error code: 0x0004005.
This turns out to be a rather generic error code, it actually even states “Unspecified error”. So, what gives?
Troubleshooting network problems
First things first, reboot! Always a good first step with Windows problems! But that did not solve this.
Since it was Windows 10 now, the next step I took was to run the Windows Troubleshooter.
From the Start menu, I selected Settings, then Update & Security. Next, I selected the Troubleshoot option in the left-hand panel, and then clicked Additional troubleshooters.
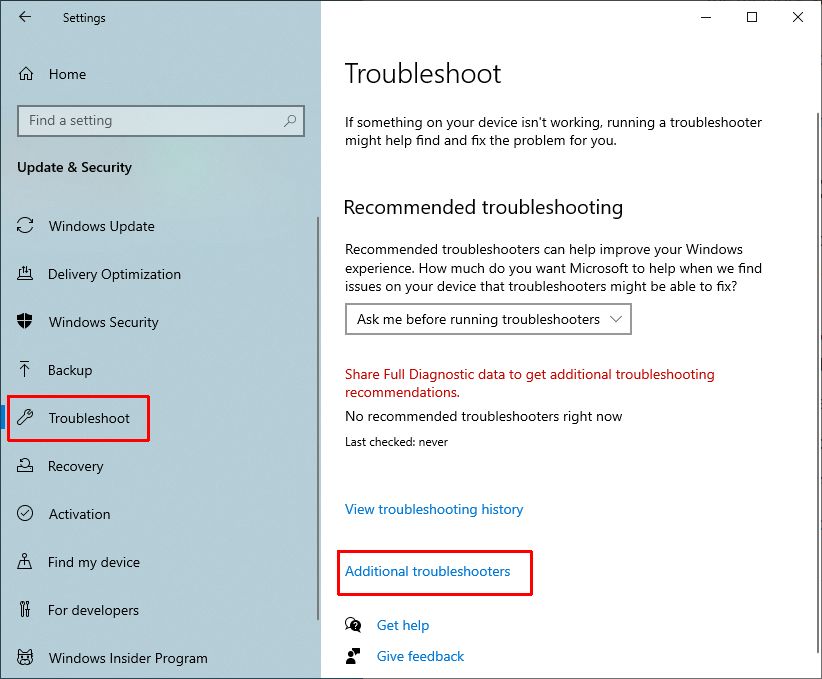
In the Additional troubleshooters window, I click the Network Adapter option. Then finally, I clicked the Run the troubleshooter button.
After this, I basically followed the troubleshooting wizard. Picked the network adapter (all in my case), and what type of network problem. The troubleshooter analyzes the system and did not find any problem.
Just to make sure, I opened the Device Manager and checked that the network adapters did not show any errors and had proper, working drivers.
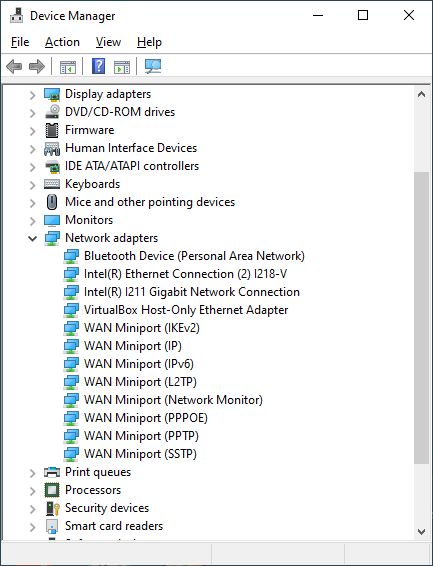
No issues there, but if so, you can try to update the drivers for the various network devices. Since this was a recently upgraded system with the latest updates, I did not do that.
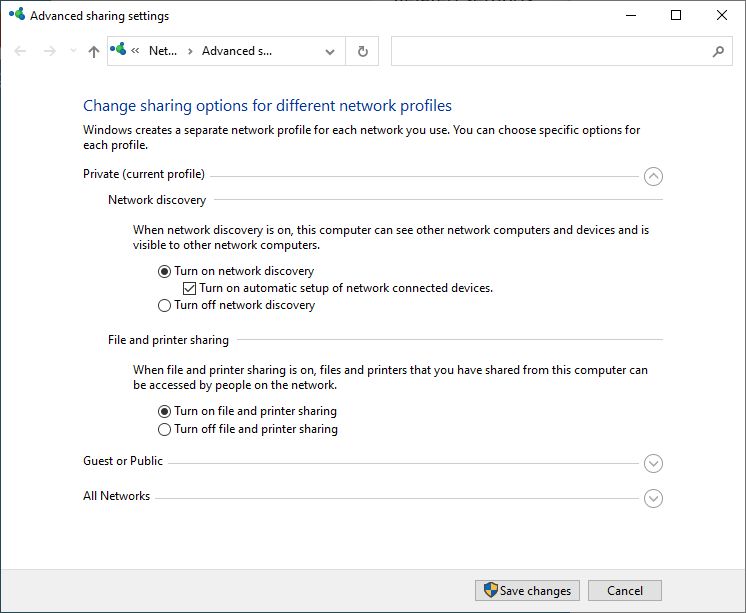
The next step was to make sure the network sharing options were correct. This is a two-stage process, checking the network profile, and then checking the sharing options for that profile.
Again, Start, Settings, but now Network & Internet. This will show the status of the network connections. By clicking the Properties button for each connection, I made sure both were set to Private. This is the best setting for home or personal office usage, as it enabled file and printer sharing.
Back to the Network & Internet window, I clicked the Ethernet option (the system is using a cabled network). Next, I clicked Change advanced sharing options.
Under Private (current profile), I made sure the options Turn on network discovery, and Turn on file and printer sharing were selected, and then I clicked the Save changes button.
This still did not fix it! I did a Network reset in the Network & Internet status window, just to make sure. Still nothing.
More advanced network error troubleshooting
Since I was not getting further with the network error (0x80004005), I had to look at more detailed network settings.
One thing I noticed when I tried to ping my NAS, was that it did not seem to be using an IPv4 network address. Rather I saw an IPv6 network address. I know this can be a problem in some cases. Although you can disable IPv6 altogether, I did not want to do that. So instead I prioritize IPv4 over IPv6.
This requires adding a setting to the Windows registry.
I typed regedit in the Search box in the Windows taskbar, and then clicked the Registry App. I had to click Yes in the UAC windows to confirm starting the registry editor.
In the registry editor, I located the HKEY_LOCAL_MACHINE\SYSTEM\CurrentControlSet\Services\Tcpip6\Parameters key and added a new DWORD value. The name should be DisabledComponents, and the value should be 0x20 (Hex), or 32 (Dec).
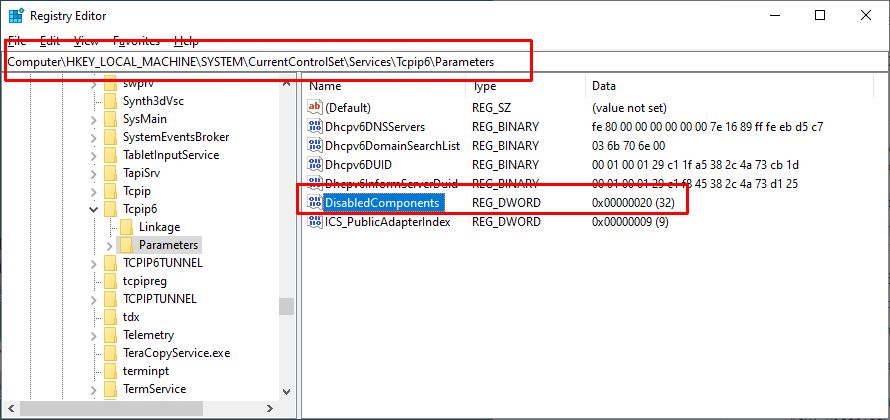
I closed the registry editor and restarted the system.
Okay, now my ping goes to the IPv4 network address that I know to belong to my NAS! But I still cannot access the NAS shares using the \\<NASNAME>.
So, what? NetBIOS is not working? I can access other systems on my network using their name, just not the NAS. So unlikely, but I checked anyway. Start, Settings, Network & Internet, Ethernet, followed by clicking the Network and Sharing Center option.
Next, I click the Change adapter settings, right-click the adapter, and select Properties.
I select the Internet Protocol Version 4 (TCP/IPv4) option in the list and click the Properties button. In the Properties window, I click the Advanced button and then select the WINS tab in the Advanced settings window.
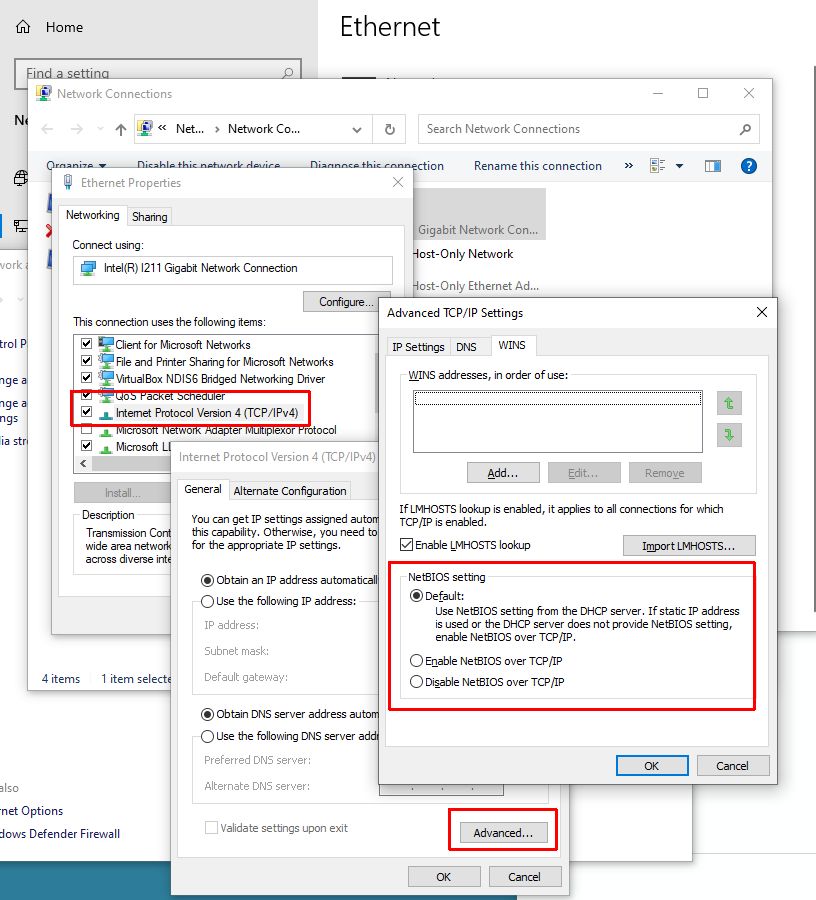
And yes, the NetBIOS setting is set to Default. This means it will use the settings of the DHCP server or enable NetBIOS over TCP/IP if not provided. Although you can change it to deliberately enable NetBIOS over TCP/IP, I tried that and it did not make a difference. Conclusion: NetBIOS is enabled and it is not the cause of my problem!
So, after closing a whole lot of windows again, I am no further.
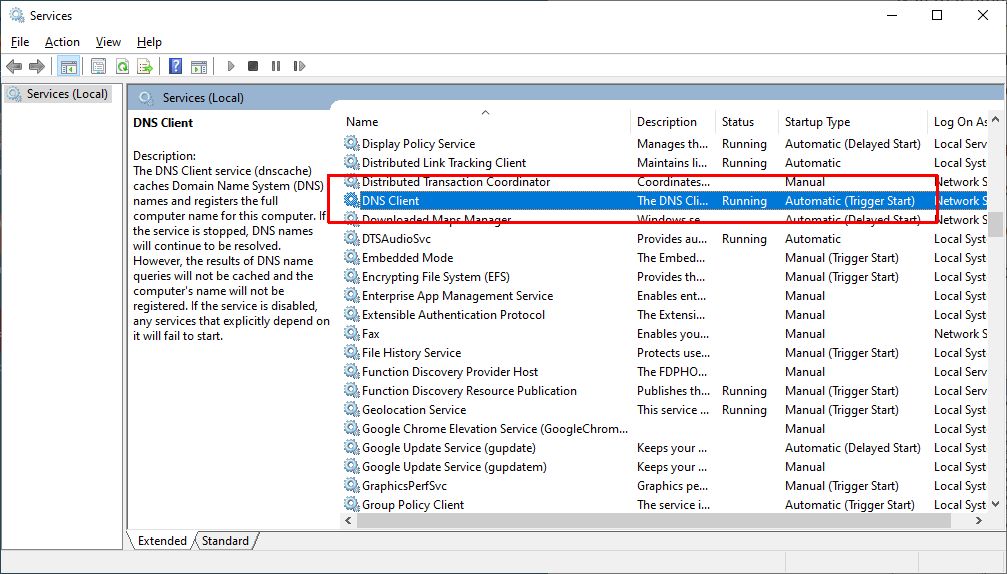
To make sure, I also verified that the DNS Client service was running. Using the Search option in the taskbar, I typed services and click the Services App in the search result. I can see that the DNS Client is running and set to Automatically start.
The solution to my network error
Finally, I thought, let me check the other side. Maybe something is off in the NAS configuration.
So, I opened up the network interface to my NAS using the IP number. As you can see this is a NetGear ReadyNAS Ultra 6. It is an older NAS device, but since I upgraded the disks in it to 3 TB drives, it is still a useful 12 TB storage device.
The configuration that is interesting in this case is the Services section, where I can configure the various file protocols and streaming and discovery services. In the screenshot, it is immediately obvious.
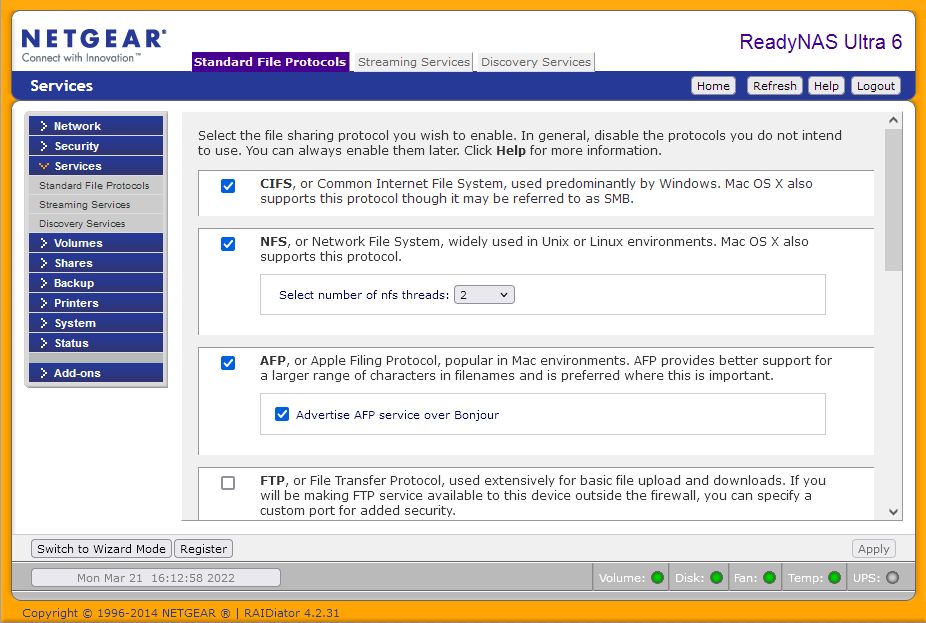
The NAS is using CIFS, which is also referred to as SMB. This is a legacy protocol (over 30 years old), which is not seen as secure, and as a result, is disabled by default by Microsoft.
My system is on a local network, and I have a firewall and Anti-Virus software installed. And since I do want to access the NAS without an easy way to upgrade the NAS firmware, I will enable the CIFS in Windows 10.
Using the Start, I open type features in the Search box. In the search results, I click Turn Windows features on or off. This brings up the Windows Features window.
In the features list, scroll down to the SMB 1.0/CIFS File Sharing Support. I do not turn the option on, but rather open the child list, and only enable the SMB 1.0/CIFS Client. I just need to access the NAS, there is no need for other computers to access this system using SMB.
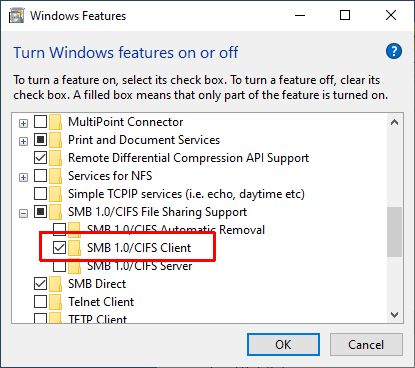
After clicking the OK button, Windows adds the feature. After waiting for this to complete I did another Windows restart. As I (hoped and) expected, my NAS device is accessing by its name and I can access the shared on the NAS!
Perhaps my experience troubleshooting this network error can help someone else!


Thank you. It works.
@Fritz Liessling - Thank you for your feedback. I understand that you are looking for other resolutions, but within Windows…
Although the answer to this question is correct, it is really a cop-out answer. It's easy enough to find answers…
To the pcauthorities.com administrator, You always provide useful links and resources.
???? ?? ??? The Last of us