Delete the Windows.old folder in Windows 10 after upgrade
Whenever you do an upgrade of Windows 10, a Windows.old folder will be created on the system drive (the driver Windows is installed on). This folder contains all important files and data from the previous Windows version (starting with Windows Vista). You can delete the Windows.old folder if you want to free up disk space.
What is the Windows.old folder?
The Windows.old folder is created to make sure a backup is available and restoring the old version is possible in case there is a problem, or you are simply not happy with the new version. You can actually use the Explorer to browse files in the Windows.old folder and individually copy them if needed after you upgraded Windows.
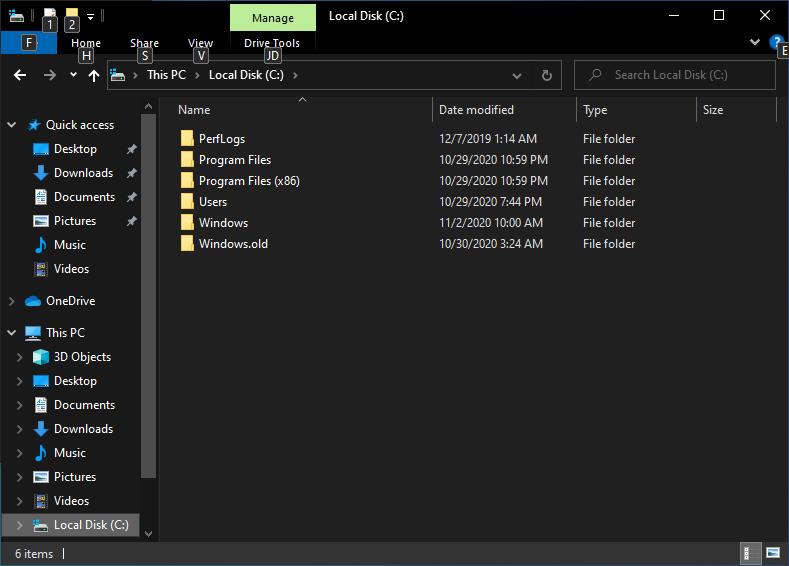
The folder view in the file explorer for the system driver (usually C: ) will show the Windows.old folder.
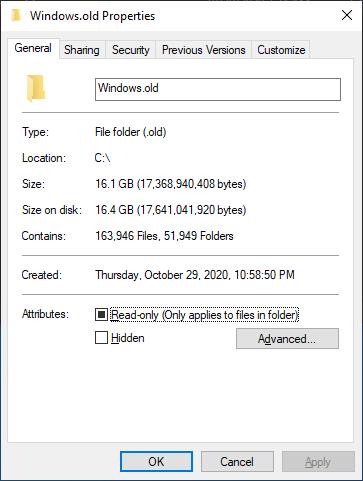
If you right-click the Windows.old folder and select Properties in the popup menu, you will see how much storage space the old version of Windows still uses.
In this case, 16 GB, which is not much for modern hard disks, but for a smaller SSD drive, this can be a significant percentage of the total storage. In most cases the size of the Windows.old folder will be much bigger.
Now, you can just wait until Windows decides that it is time to remove the old Windows version (normally after 10 days of upgrading without problems), but if you are confident that the new version is running fine and you need the space, you can delete the Windows.old folder manually.
Keep in mind though that your will only be able to revert back to the previous Windows version by reinstalling it after you delete the Windows.old folder!
First option: use Windows Storage Sense.
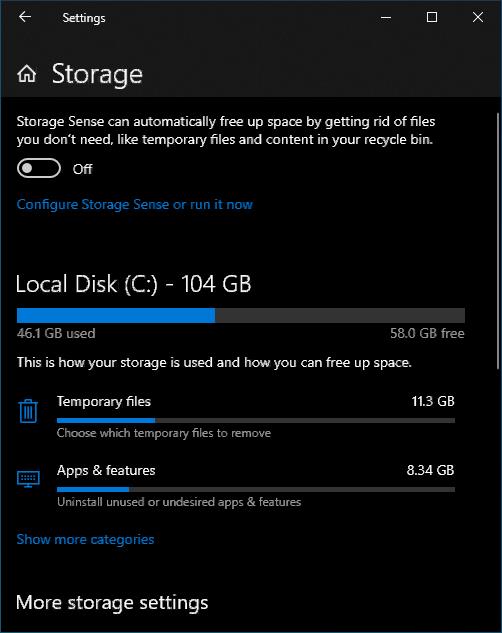
Click the Start button, and click Settings. Next, click the Storage option.
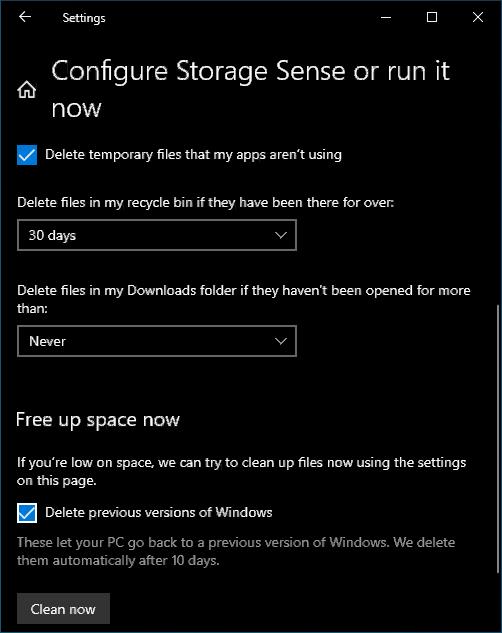
Now select the link called Configure Storage Sense or run it now.
Then scroll down and select the checkbox Delete previous versions of Windows, and click the Clean now button.
After the process completes, the Windows.old folder will no longer exist, and the free storage space on your system drive will have increased!
Second option: use the Temporary files option.
This is actually the Microsoft recommended method to delete previous versions of Windows.
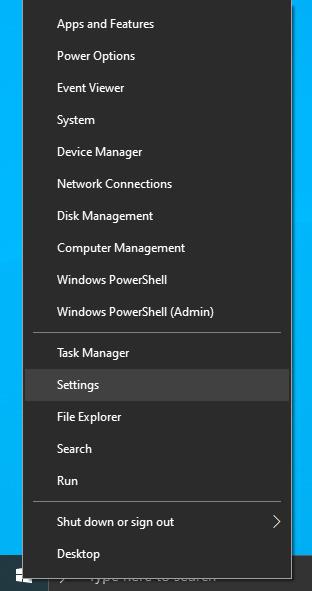
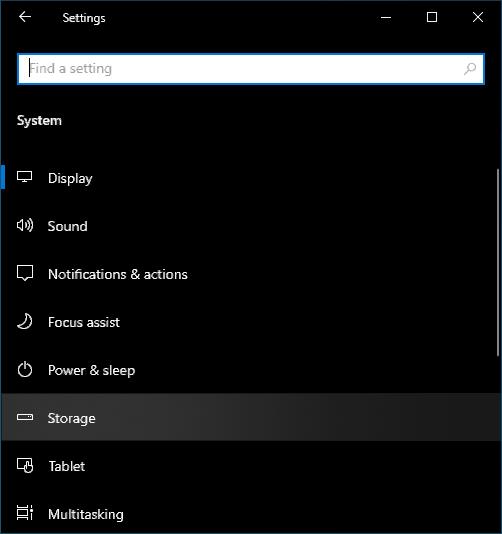
Right-click the Start button and select Settings in the Start menu.
Next, select System and then select Storage.
This will bring up the Storage settings window with details about the disk usage on your PC.
Now click Temporary files.
The window will show Scanning: while it is analyzing the disks.
Wait for details to show, which can take a moment depending on the storage available on your system (number and types of disks present and storage usage on those disks).
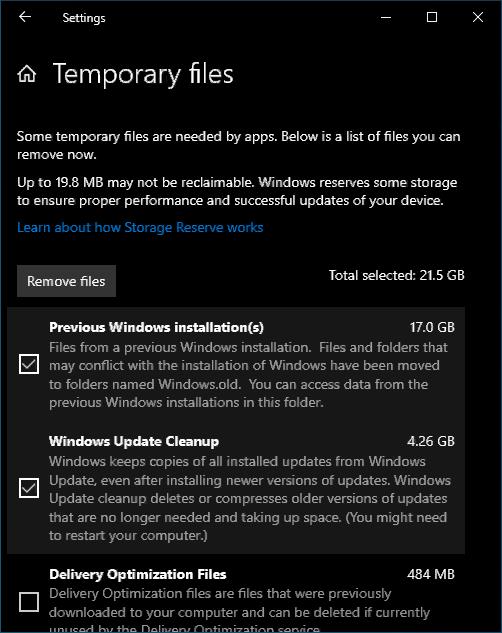
Make sure you select the checkbox named Previous Windows installation(s), and then click the Remove files button.
The text will change to Purging: Previous Windows installation(s) while the removal process is ongoing.
Third option: use Disk Cleanup to delete the Windows.old folder.
This is very similar to the second solution, but maybe you prefer this more traditional method using the Windows File Explorer. The steps are more like previous Windows versions, where Disk Cleanup can be used for actions to free up disk space. Do note that this option might no longer be available in the latest Windows 10 versions.
Start by opening the File Explorer.
Locate the system drive (in most cases this will be the C-drive), and right-click it.
In the popup menu, click Properties.
Next, click the Disk Cleanup button.
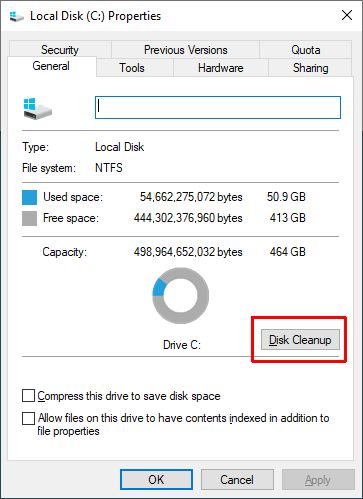
This will bring up the Disk Cleanup window for the selected drive. In the Disk Cleanup tab, which is selected by default, you will see the list of Files to delete. First, click the Clean up system files button to make sure the list of files to delete includes the previous windows installations entry. The drive will be scanned again to add the system files to the list, which can take a few seconds.
Scroll down until you see the option Previous Windows installation(s), and make sure to select the checkbox in front of it.
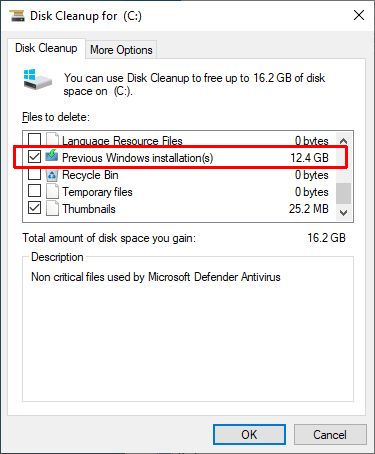
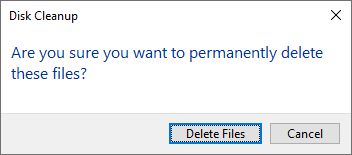
Now click the OK button to start the disk cleanup operation. After you click OK, another window will show to confirm the files will be permanently deleted. Click the Delete Files button.
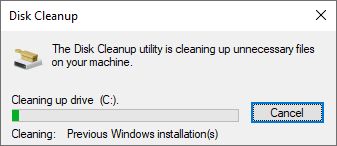
After this, the disk cleanup process starts. A window will show the progress of the operation. Depending on the speed of the drive and the number of files that need to be deleted, this operation can take a bit of time.
Just wait for it to finish and then close the drive properties window. You can check the drive properties window before closing to see that the amount of Free space has increased.
Other options to delete the Windows.old folder
So why not simply delete the Windows.old folder from the command prompt or Explorer?
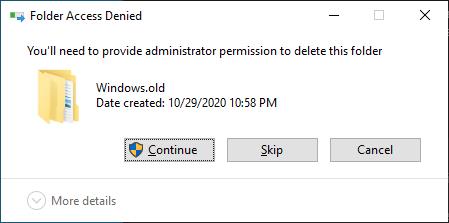
Well the reason for that is that the Windows.old folder is protected from exactly that, accidental deletes. You will need to change the security properties using the attrib command in the command prompt or changing the folder permissions.
Without it, you will see messages that the files cannot be deleted.
So using these manual approaches is definitely possible, but probably not as easy as the first three methods described here.


Thank you. It works.
@Fritz Liessling - Thank you for your feedback. I understand that you are looking for other resolutions, but within Windows…
Although the answer to this question is correct, it is really a cop-out answer. It's easy enough to find answers…
To the pcauthorities.com administrator, You always provide useful links and resources.
???? ?? ??? The Last of us