How to Control Quick Access and Recent Files in Windows 10
Microsoft tries to make things easier in Windows. One feature contributing to this is easy access to recently used files in the File Explorer. This is also called Quick Access, and the list is updated based on recently opened files. In general, this feature is a time-saving option to quickly access files that you have recently worked on and need to open again. But there can be scenarios where you want to exclude files and folders from this recent file list in Windows 10 (or Windows 11).
There are a few scenarios we cover in this article. First, there is the option that you simply want to clear the Quick Access list so you can use the PC in a demonstration or presentation, or simply show it to someone who should not see that information. Then there is the case of recent files or folders in the Quick Access list that you want to remove from the list. And then there is the possibility that you might want to use Quick Access at all and disable it.
Clear the Quick Access list
To remove all current items in the recent files and folders list in Windows 10:
- Open the File Explorer (Windows + E keys).
- In the File Explorer window, click the View menu (1).
- Then click the Options dropdown (2), and finally click the Change folder and search options in the dropdown menu (3).

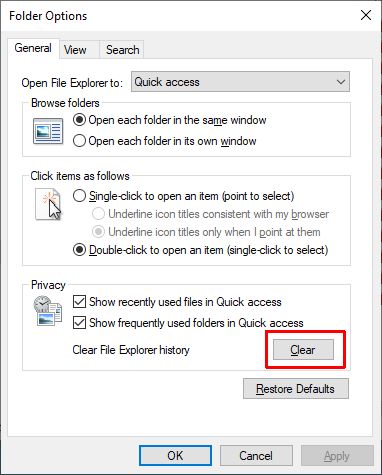
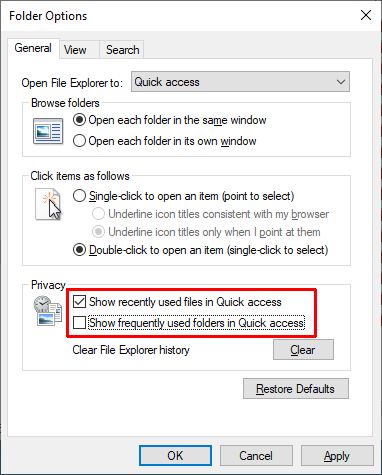
This will bring up the Folder Options dialog box with the General tab active. - Click the Clear button under Privacy to clear all files and folders from the File Explorer history.

This will clear the Quick Access list.
The File Explorer window will now show Recent files (0) under Quick access.
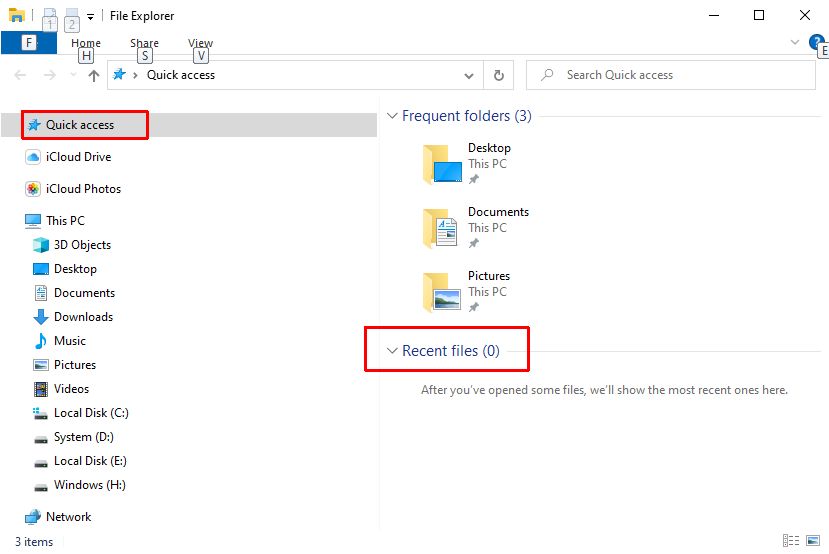
Remove a File or Folder from the recent file list
What if you do not want to clear the complete recent files list but only remove a single file or folder? That is also possible directly from the File Explorer.
- Open the File Explorer.
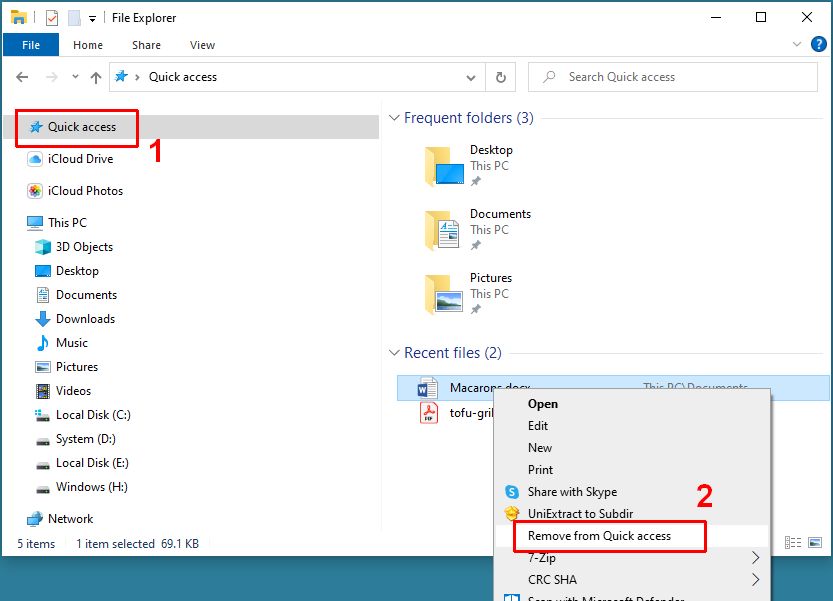
- In the File Explorer, make sure the Quick access option is selected in the left-hand panel (1).
- In the right-hand panel, right-click the file (or folder) you want to remove.
- In the context menu, click the option Remove from Quick access (2).

The file or folder will immediately be removed from the Quick Access list, while all other items remain.
As mentioned earlier in the article, Windows keeps track of recent usage to show files and folders in the Quick Access list. So manually adding a file to the list is not possible, the list is based on file usage. But there is an option to manually add a folder to the Quick Access list. As with many similar options in Windows, this is called pinning. To pin a folder to the list, right-click the folder in the File Explorer and select the option Pin to Quick access.
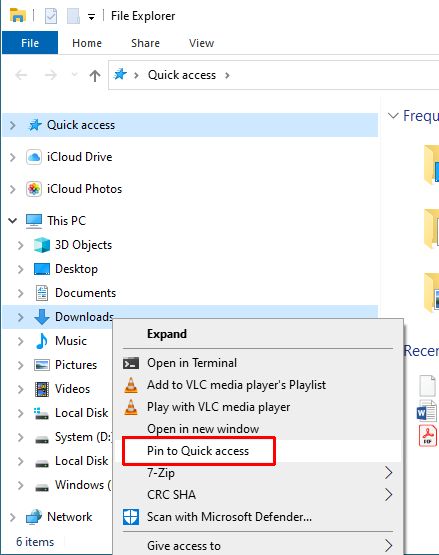
This way, you can add folders to the list that you need quick access to without waiting for them to show up based on frequent usage. It also allows you to add folders to the list when you exclude folders from being added to the Quick Access list in general.
Disable Quick Access for Files and Folders
Unfortunately, there is no way to exclude individual files or folders from being included in the Quick Access list. Based on recent usage, all files and folders are added to the recent files and folders list.
What is possible, however, is to indicate if files or folders should be added to the list in general. Using the File Explorer viewing options.
- Open the File Explorer.
- Click the View menu, followed by the Options dropdown, and then click Change folder and search options.
- In the Privacy section, clear the checkbox for the option Show frequently used folders in Quick access to prevent all folders from being added to the list. Only pinned folders will still show in the Quick access list after this.

- To prevent files from showing in the list, clear the checkbox Show recently used files in Quick access.
- Click OK to confirm and close the dialog box.
Tip: Want to open the File Explorer to the “This PC” location rather than “Quick access”? Change the Open File Explorer option at the top of the dialog box.
Don’t want to see the Quick access option in the File Explorer at all? Even that is possible, but it requires a modification to the Windows Registry.
Open a command prompt with administrator rights and type:
REG ADD HKEY_LOCAL_MACHINE\SOFTWARE\Microsoft\Windows\CurrentVersion\Explorer /v HubMode /t REG_DWORD /d 1 /f
This command will add a registry key telling the Explorer to now show the Quick access option. The quick access functionality will not be disabled, but only hidden. Of course, you can also do this using the Registry Editor if you prefer a GUI over the command prompt.
To undo the change and show the Quick access again in the File Explorer, repeat the command but use 0 instead of 1 for the DWORD value.
Hopefully, with the instructions above you will be able to tweak and configure Quick Access in Windows 10 to your liking and get the best usage out of it.
Tip: a similar method exists for controlling recent files in Office.



Thank you. It works.
@Fritz Liessling - Thank you for your feedback. I understand that you are looking for other resolutions, but within Windows…
Although the answer to this question is correct, it is really a cop-out answer. It's easy enough to find answers…
To the pcauthorities.com administrator, You always provide useful links and resources.
???? ?? ??? The Last of us