Hide Windows 11 message ‘System requirements not met’
Not ready to buy new hardware to support the Windows 11 system requirements yet? In that case, there are ways to install Windows 11 on unsupported systems. But it seems Microsoft is not a fan… They are implementing a warning message that will show on the desktop stating ‘System requirements not met’. When you install Windows 11 on an unsupported system you probably want to hide this message.
It is quite understandable that users will get the best experience and support on a new computer that meets Microsoft’s system requirements for Windows 11. Security, performance, feature support, can all be limited by hardware restrictions. But many users are not ready to buy a new computer. It can be a lack of funds or being quite happy with the current hardware, or any other reason. So if you don’t want to be stuck on Windows 10 (or an even older version), you can still install Windows 11. Do make sure Windows 10 can install the Windows 11 upgrade.
Hide the message ‘System requirements not met’
Microsoft has information on how to prevent the message (watermark or in the Settings window). This method involves the group policy editor, which is not part of all Windows editions. Organizations are often running the Pro or Enterprise editions, so this solution can be easily implemented by system administrators. Home users, however, mostly run the Home edition, which does not have the group policy editor.
Luckily, for now, even for users of the Windows 11 Home edition there is a simple way to hide the message (or watermark) by using a registry tweak.
Here are the steps:
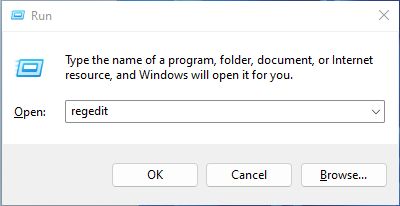
- Open the Run window by pressing the Windows + R keys.
- Type ‘regedit‘ in the Run windows input field and press the Enter key, or click the OK button.

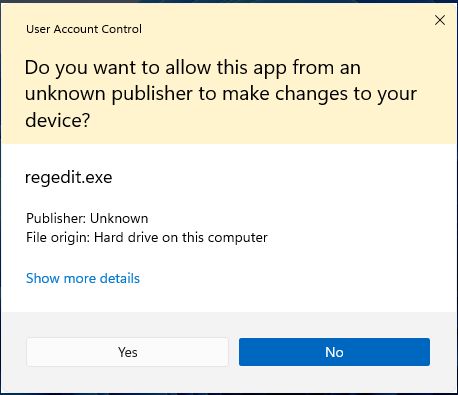
- If the User Account Control window shows, click the Yes button to confirm starting the regedit application.

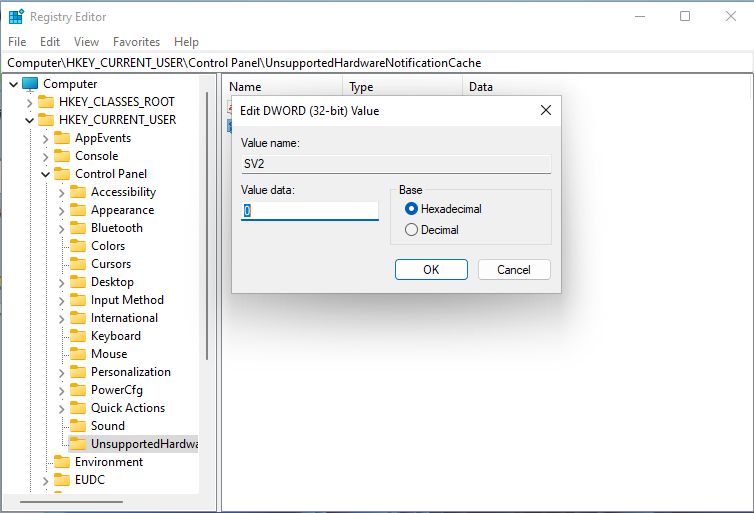
- Navigate to the following key: HKEY_CURRENT_USER \ Control Panel \ UnsupportedHardwareNotificationCache
- Next, find and double-click the key named SV2.
- Change the value to 0 and click the OK button.

- Close the Registry Editor.
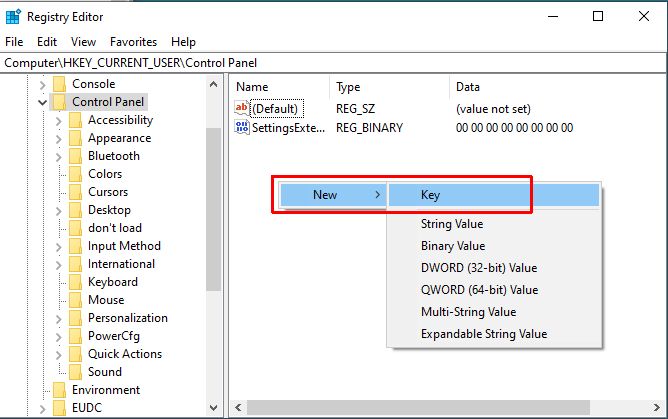
If the UnsupportedHardwareNotificationCache key does not exist, create it:
- Right click in the right-hand pane and in the popup menu, click New.

- Select Key, and then type UnsupportedHardwareNotificationCache as the name for the new key.
- Press Enter to confirm the new key name.
- Right-click in the right-hand pane, and in the popup menu select New.
- Now select DWORD (32-bit) Value.
- Type SV2 as the name and press Enter to confirm.
- Double-click the SV2 entry to edit it.
- Change the Value data from 1 to 0 and click OK.
After this, the message should disappear. Happy Windows 11 computing!
Note: If the registry tweak doe not work, you might need to replace SV2 with SV1. For Windows 11 builds below 22557, the SV1 key is required.
Tip: Since editing the Registry can affect the operation on Windows, you can make a backup of the registry first.


Thank you. It works.
@Fritz Liessling - Thank you for your feedback. I understand that you are looking for other resolutions, but within Windows…
Although the answer to this question is correct, it is really a cop-out answer. It's easy enough to find answers…
To the pcauthorities.com administrator, You always provide useful links and resources.
???? ?? ??? The Last of us