How To Install A Non-Plug And Play Device Using the Add Hardware Wizard in MS Windows XP Professional
To install a non-Plug and Play device using the Add Hardware Wizard in MS Windows XP Professional:
- Connect the device to the computer.
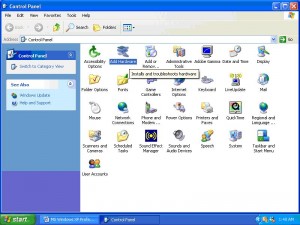
- Go to the Windows Start menu, select the Control Panel option, and then double-click the Add Hardware icon.
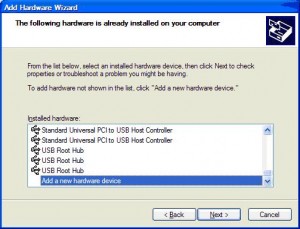
- The Add Hardware Wizard appears. Click the Next button.
- Select the option, Yes, I have already connected the hardware and then click the Next button.
- Look for the Installed hardware section, select the Add a new hardware device and then click the Next button.
- Select if the wizard should search for and install the hardware automatically, or install the device that you select from a list. Click the Next button.
- The succeeding wizard options depend on the selection made in step 6. Follow the instructions and then click the Finish button.
- Re-start the computer if advised to do so.


The driver for the device should automatically be installed in this process. If Windows XP does not support the device by default, it will ask for a driver disc or location during the device installation. Once Windows XP reboots, the device should be detected and working.
You can use the Windows Device Manager to check the status of the new hardware.

Thank you. It works.
@Fritz Liessling - Thank you for your feedback. I understand that you are looking for other resolutions, but within Windows…
Although the answer to this question is correct, it is really a cop-out answer. It's easy enough to find answers…
To the pcauthorities.com administrator, You always provide useful links and resources.
???? ?? ??? The Last of us