Fix Windows Update Error 0x80248007
Installing updates in Windows is a process that executes regularly. Microsoft releases updates to patch bugs, release new functions, or address security concerns. Although updates generally install without problems, Windows can experience errors in the Update process. One such error is update install error 0x80248007. This error will prevent an update from installing.
There are different possible reasons for the update error. Pending updates, a failed previous update, file access issues, or even problems with the Windows Update process itself. The error can occur in both Windows 10 and Windows 11.
In this article, we’ll show the steps to fix the Windows update error 0x80248007.
Restart Windows
One of the causes of the Windows update process failing is a conflict with or dependency on another update. In that case, Windows Update will show a Restart now option in the Settings window.
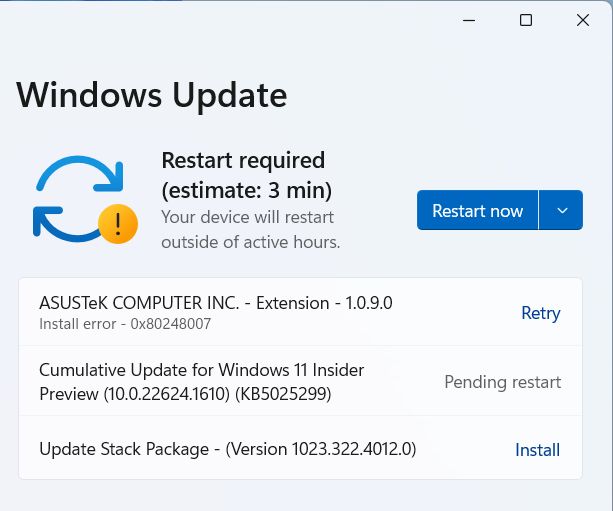
If you see the Restart now option, click the button to complete the updates that are pending for a restart. That will ensure no pending updates have an impact on the update that is resulting in the install error 0x800248007.
Run the Windows Update Troubleshooter
Microsoft has included a number of troubleshooter functions in Windows. One of them is the Windows Update Troubleshooter. This option will automatically analyze the Update service and try to fix any issues automatically. The troubleshooter will be able to resolve any known problems, so running it is the first step in solving any update errors.
- Select Settings in the Start menu (or press the Windows + I keys).
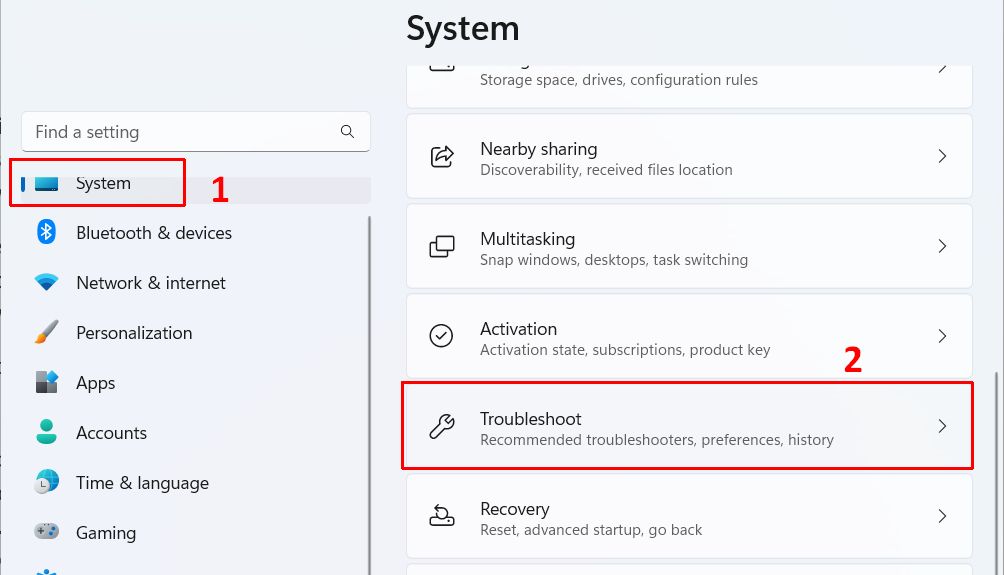
- In the Settings window, select System in the left-hand pane (1), and then select Troubleshoot in the right-hand pane (2).

- Next, select Other troubleshooters in the right-hand pane.
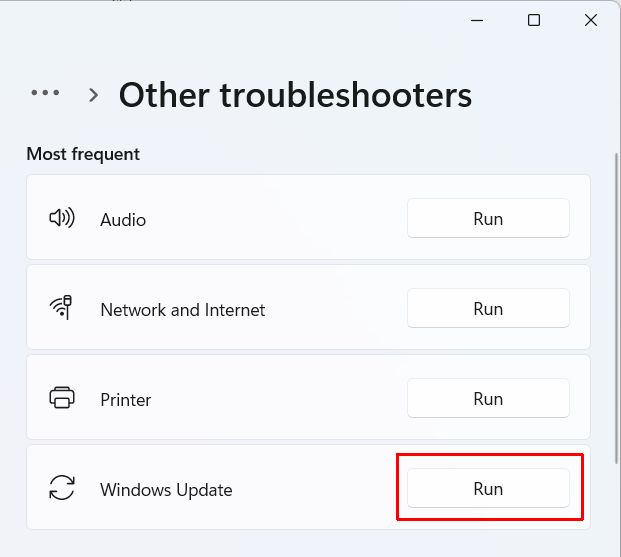
- In the list of other troubleshooters, locate the Windows Update option and click the Run button next to it.

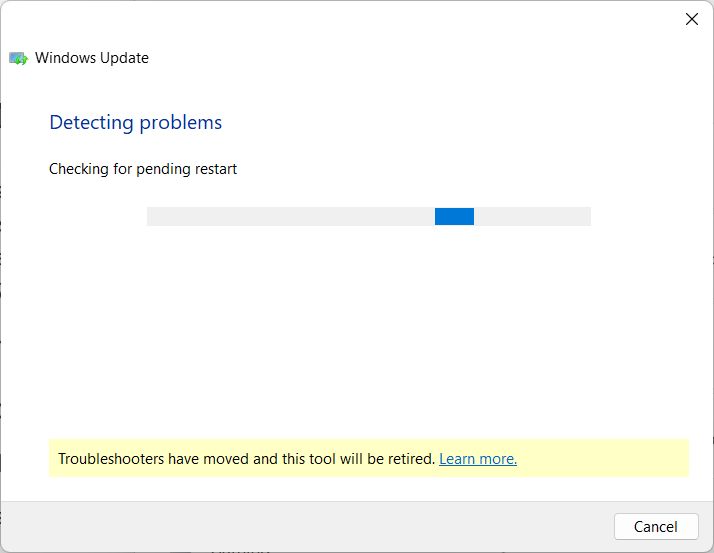
- A new window will come up that will show the progress of the Windows Update troubleshooter. Wait for the troubleshooter to complete.

Note: The Windows Update troubleshooter can take some time to complete. If the Resolving problems text keeps showing for a long time, you may need to Cancel the troubleshooter and try another solution.
After the Window Update troubleshooter completes, try installing the problematic update again.
Note: For the latest Windows 11 versions, Microsoft plans to retire the troubleshooters and replace them with something they call Get Help. Access to these services would be the same though. More can be read on the Microsoft site.
Start or Restart the Windows Update service
If the Windows Update troubleshooter is not able to complete or fix the install error, manually checking the Windows Update service can help.
The Windows Update service is a background task that needs to be running for updates to be downloaded and installed.
To check the Windows Update service, use the steps below.
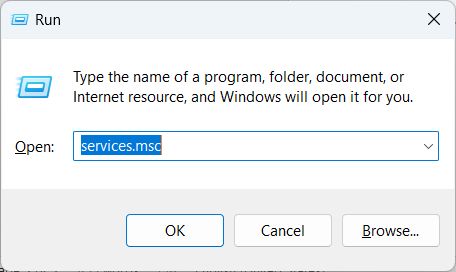
- Press the Windows + R keys to bring up the Run window.
- Type services.msc in the Open field.
- Press Enter or click OK to execute the command.

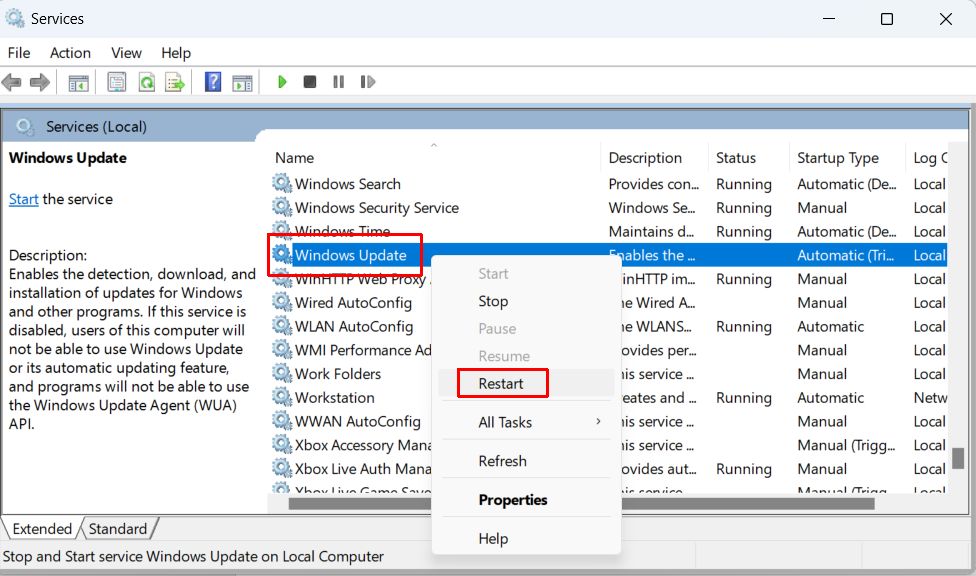
The Services windows will open. - In the list of services, scroll down until you see Windows Update.
- Right-click the Windows Update entry, and select Restart in the popup menu.

- Close the Services window and try installing the problematic update again.
Tip: Double-click the Windows Update service and set the Startup Type to Automatic to make sure it starts every time Windows starts.
Clear Temporary Windows Update Files
Like many other software programs, the Windows Update service needs temporary storage space for downloading and extracting installation files. In most cases, the Windows temp folder is used, but for Windows Update a special location on disk is used. Cleaning this location of temporary files can help solve install error 0x80248007. Failed previous attempts or remnants of other updates can negatively affect the installation of an update.
- Before clearing the temporary update files, stop the Windows Update service. Use the instructions from the previous section to open the Services window and locate the Windows Update service. Instead of Restart, select Stop in the popup menu to stop the service.
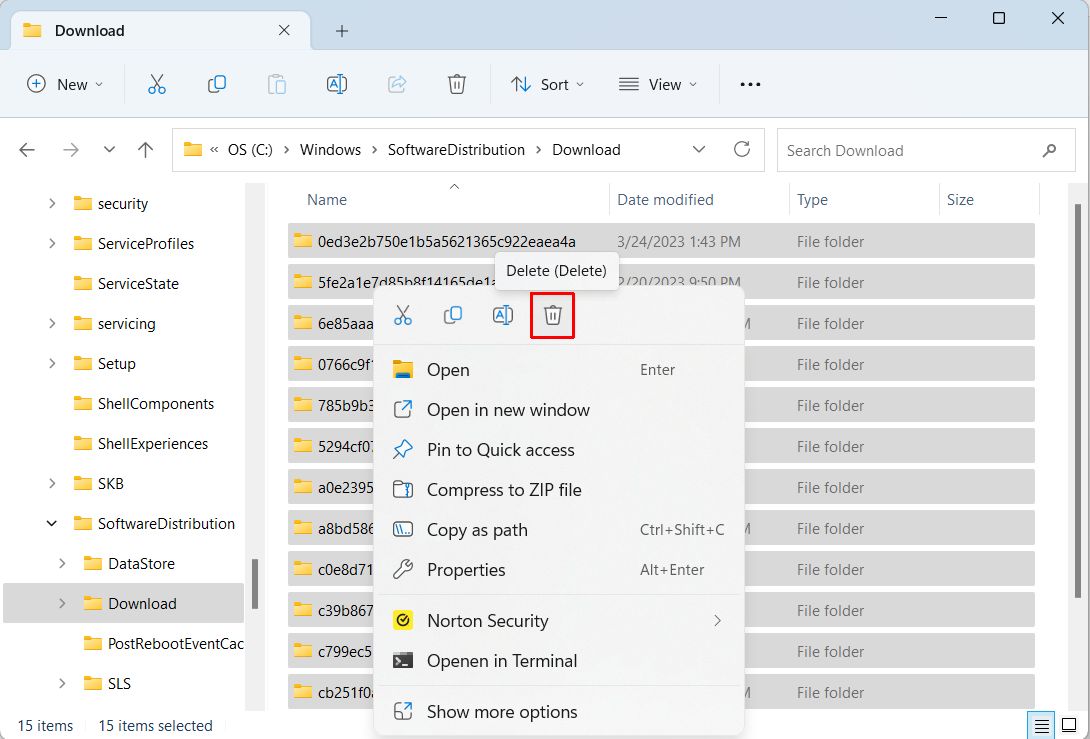
- Next, open a File Explorer window (Windows + E keys) and navigate to the SoftwareDistribution folder inside the Windows folder.
Typically, this will be C:\Windows\SoftwareDistribution\DataStore - Inside this folder, you will find two subfolders called DataStore and Download. Delete all files inside both folders.

- Select the DataStore folder.
- Use Ctrl + A to select all files and folders inside.
- Click the trashcan icon in the toolbar, or right-click any of the selected files and select the trashcan icon in the popup menu.
- Repeat these steps for the Download folder.
Note: Empty the trashcan from the Windows Desktop icon to make sure the files are actually removed from disk.
- Next, go back to the Services window and Start the Windows Update service again.
After this, go back to the Windows Update option in the Settings window and try to install the problematic update again.


Thank you. It works.
@Fritz Liessling - Thank you for your feedback. I understand that you are looking for other resolutions, but within Windows…
Although the answer to this question is correct, it is really a cop-out answer. It's easy enough to find answers…
To the pcauthorities.com administrator, You always provide useful links and resources.
???? ?? ??? The Last of us